omg dont be ashamed at all!! Hands are generally tough to get used to, lots of artists struggle with it! so dont be ashamed i feel you.
and I actually have made a hand anatomy guide before in fact! If you want to get better at drawing hands I def recommend you learn the basic anatomy first. Please check out the ones I made, I try to make it simple and easy to understand:
There’s my guide to the anatomy, but here’s some more tips that I’ve noted to myself that I’d like to include
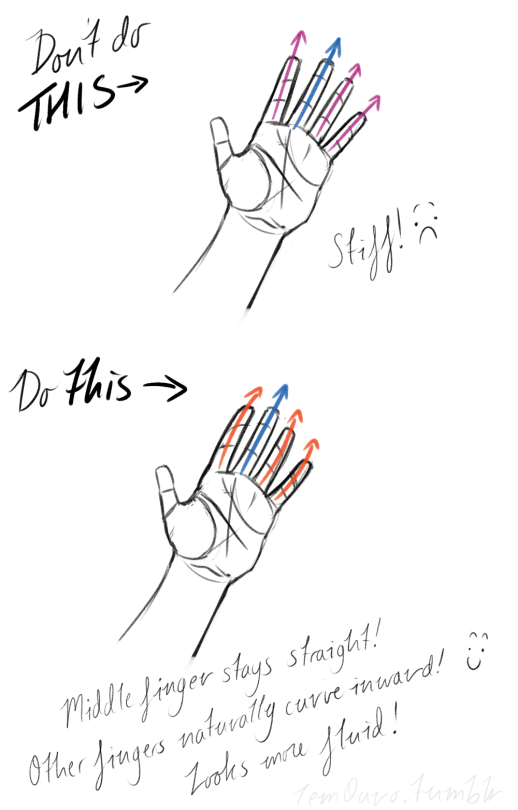
First off, I’d like to just note on the fingers: if you pay close attention to your own hand, you may notice the fingers are ever ever so slightly curved inward. It’s a very subtle detail, but I noticed that, despite how slight it is, it can make a hand look more lively, and less stiff.
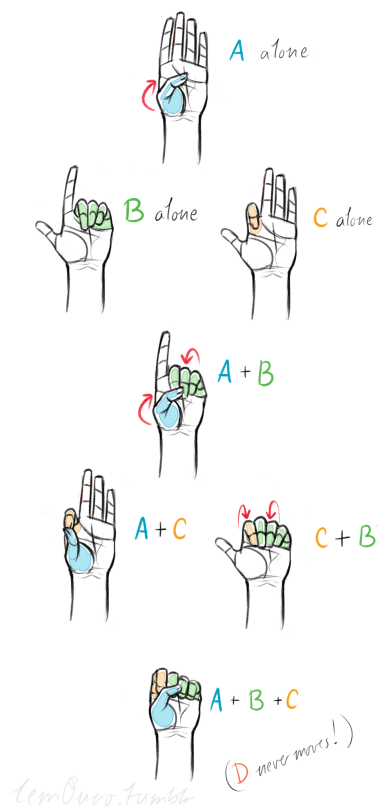
Second, the “M” on the palm! Your hand moves in many ways, and because it does it creates creases in your hand. The most prominent creases appear to make an M shape; this is handy to remember for what I’m going to talk about next. (It also could be a “W” I guess, or to be more specific a “ )X( “; just think of it in whatever way helps you remember!)
SO now that you see the M, draw your hand as a basic blocked shape and add your details. As you do, you can see that the M divides the palm into four basic parts!
When the hand moves, parts A, B, or C of the palm, alone or in different combos, will create the general poses that the hands do normally. These parts are the parts that move, with D being stationary, no matter what!
Here’s a chart of all the possible combos. Once you have down what part of the hand moves for a certain pose, you can change up the fingers and tweak it a bit to do what you need to make it more specific!
This is simply my method of drawing hands. God knows there are hundreds of tutorials out there by other artists, but personally, this way helps me the best (after learning the anatomy first).
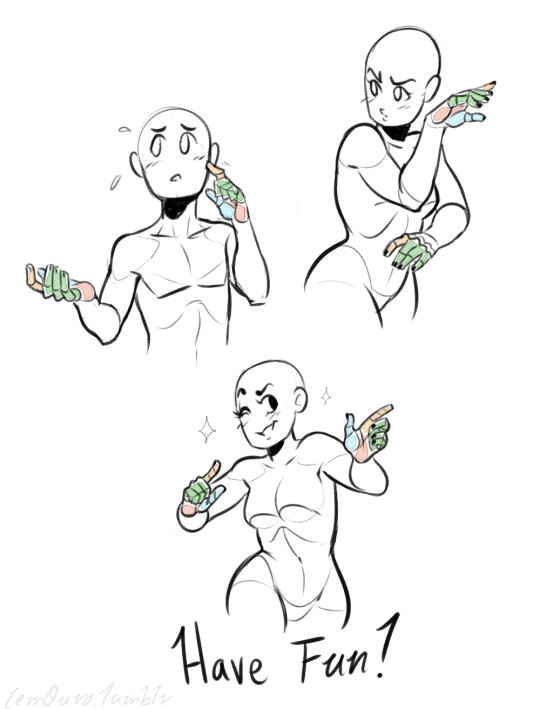
This way I can divide the hand and combine the parts in any such way I need!
Hands take a lot of effort to grapple, and you need to practice them a lot, especially foreshortening of the hand; that’s really something you need to learn through your own studies. Look at your own hands, draw hands from life, from magazines, shows, comics; just draw hands! You’ll eventually figure out a method that works best for you. So to get better at drawing hands; draw hands!! And don’t stress over it, have fun with it!
For artists who have problems with perspective (furniture etc.) in indoor scenes like me – there’s an online programm called roomsketcher where you can design a house/roon and snap pictures of it using different perspectives.
It’s got an almost endless range of furniture, doors, windows, stairs etc and is easy to use. In addition to that, you don’t have to install anything and if you create an account (which is free) you can save and return to your houses.
requested!! its just some stuff ive learned idk dont trust me too much, i had the parts for this laying around for days and was too lazy to put text on it i also added a collage of some chests ive done last minute
I draw closed snoots pretty much the same way as opened ones, as illustrated in this one tutorial i did a bit ago! Same goes for drawing opened mouths from the front.
for closed muzzles, I tend to do placement lines for where the base of the muzzle connects to the face (and also as a marker for where the bottom of the eyes are gonna go!) and a line down the center of the muzzle to help me place the nose and make the upper lip indent shape! This is something I honestly don’t do too much bc I mostly forget but it helps SO MUCH
end result from using said guidelines hfhfh
as for opened snoots, here’s a lil thing using the same formula as my first tutorial;
Firstly, I start out roughing out where I want everything to go! The purple line in the right image helps me place the top corners of the mouth, where i’ll be dragging the lines for the sides of the mouth in a sec. This is a good time to map out how you want your expression to go, since the corner of the mouth I find makes it easier to connect everything else as you’re going along.
After you get that sorted, drag the lines (blue lines) down from the corners (it’s perfectly fine if the lines don’t match up with the corners, it doesn’t have to be exact!), which are the rest of the mouth. Now is a good time to go in and tighten up/stretch the mouth shape to however it’ll benefit your character/style/expression. My sona has pretty round shapes, so I keep things rounded for her most of the time. (unless i’m exaggerating her expression, then things tend to get a little bit sharp and asymmetrical)
Annnnnnnd then you go in and start adding details! Teeth, tongue, etc. You can see I kinda shortened the lower jaw shape lines a bit after everything since I noticed the mouth was a bit too wide/sliding to the right.. Just so it aligns with the top part of the jaw a little easier!! this is pretty much how I do all my mouth/muzzle stuff, so I hope it helps a bit!