All you need to know is that I am a young adult and struggling artist and casual geek looking for my purpose in life while indulging in my myriad of geeky interests.. While here I analyze different and fascinating aspects of this nebulous concept known as "Geek Culture" as well as bridge the gap between geeks and non-geeks.
May god have mercy upon my soul for my goals are sheer MADNESS.
I made these as a way to compile all the geographical vocabulary that I thought was useful and interesting for writers. Some descriptors share categories, and some are simplified, but for the most part everything is in its proper place. Not all the words are as useable as others, and some might take tricky wording to pull off, but I hope these prove useful to all you writers out there!
When you make an animated film, you end up making A TON of drawings. A lot of those drawings are just to help describe how something is constructed or how it should move. Those drawings can get boring. So to keep it fun, the Zootopia drawings got weirder and weirder. Here’s some mildly weird ones.
So I feel like a lot of confusion with drawing in perspective is because people are not taught the absolute basics properly? So let’s do that.
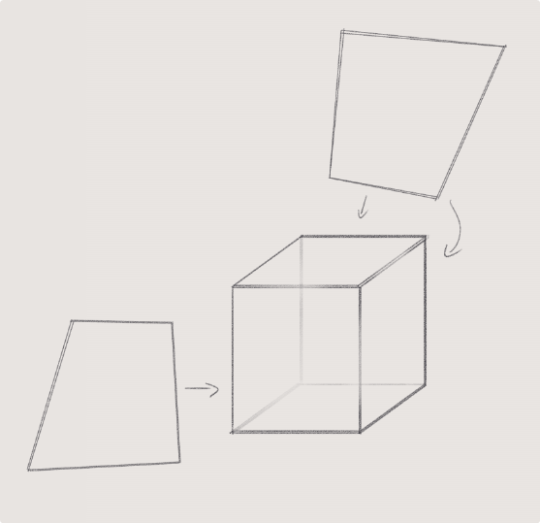
Let’s say we have a cube.
Now, a cube we know is made out of 6 squares or rectangles, and every edge is at a 90 degree angle.
so every opposite edge of a cube is exactly parallel, right?
but let’s say we draw a cube using only parallel lines:
this looks a little weird, you know? Like if i try think of this as an object in 3d space and i look at it for too long, the faces start to look really warped – with like the back looking bigger than the front as if its been made out of weird wonky trapeziums
so what’s going on here? if all those edges are exactly parallel, why does it look weird?
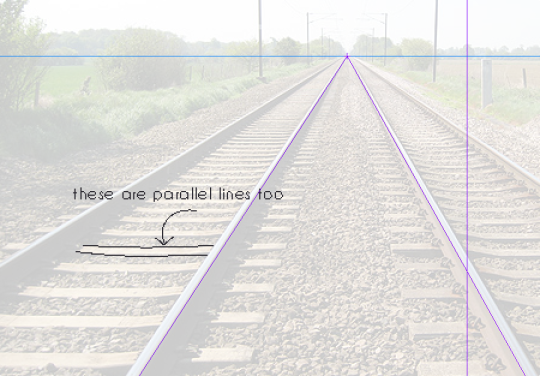
Now we know that the rails on a track are always going to be parallel, they have to be the same distance apart so the train can stay on the track yeah?
But we can very clearly see that these tracks are converging to a single point in the photo.
So what does this tell us, exactly? That our view of the world is naturally warped, and that lines that are physically parallel when drawn in perspective will converge to a single point.
Now, I could call this image “one point perspective” – but that’s not really true,
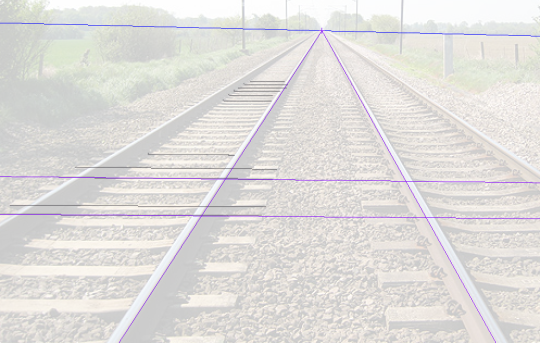
if these lines are also parallel, then they must also converge to a single point in perspective, right? so lets add another point
clip studio paint automatically adjusts the horizon line to fit the new points you add to your perspective…. notice how the horizon line actually fits the photo better now?
our new point is a very very long way away, so we don’t notice a lot of difference in the angle between lines, but the point that i’m trying to make here is:
Drawing with perspective guides is not about choosing one, two, three point perspective etc. those are just quick ways to set up a certain viewing angle
What you are doing when you use these guides is making your parallel lines converge to a point.
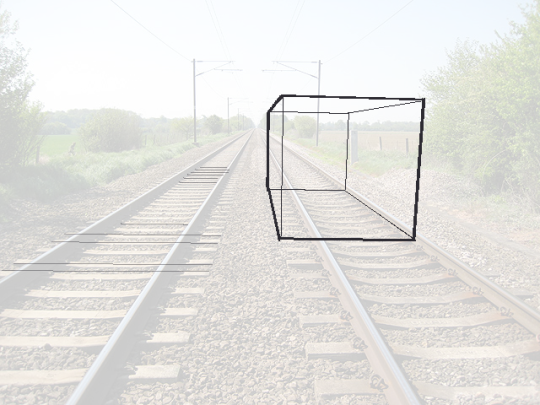
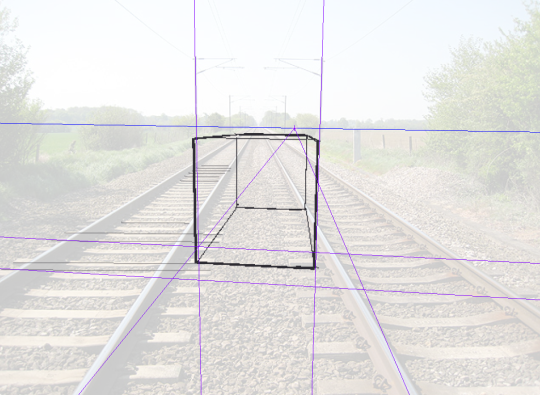
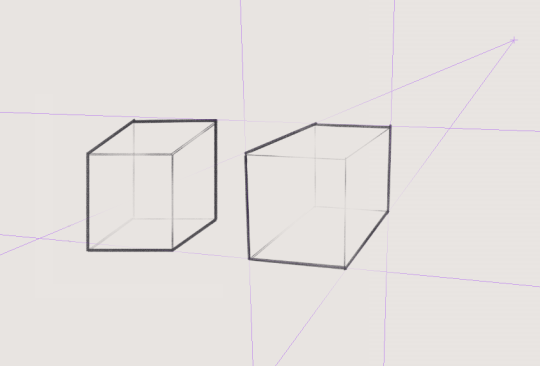
So, if you want to draw a big ol’ cube that’s aligned to be parallel with these railroad tracks, then you can do that with the same point as the tracks – because it’s parallel. It’s on the same axis!
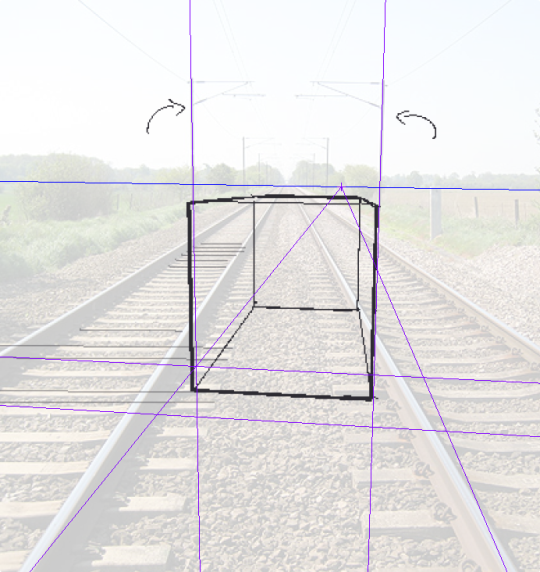
but what if you want to draw a cube that’s rotated, and isn’t parallel to the tracks?
well that’s not too difficult to do if you know that every point represents one set of parallel lines.
If these lines aren’t parallel to the ones you already have, then clearly you just need new points.
We’re not planning to tilt this cube up into the air, or rotate it onto its side, so we’re going to leave the vertical axis alone, and just move our horizontal points to a different place on the horizon line
But speaking of the vertical axis – the only points that will be on your horizon line are the ones that are flat on the ground. But you can still have points that are not on the horizon line!
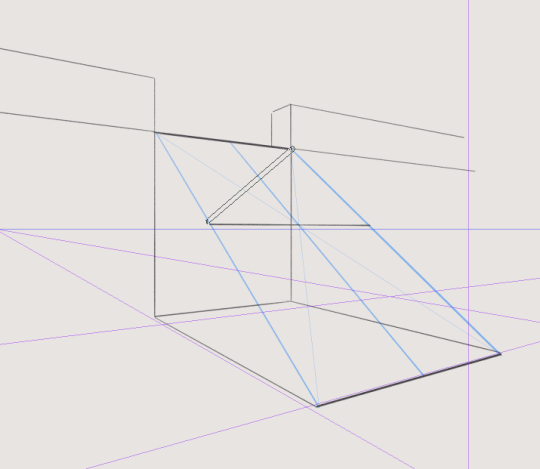
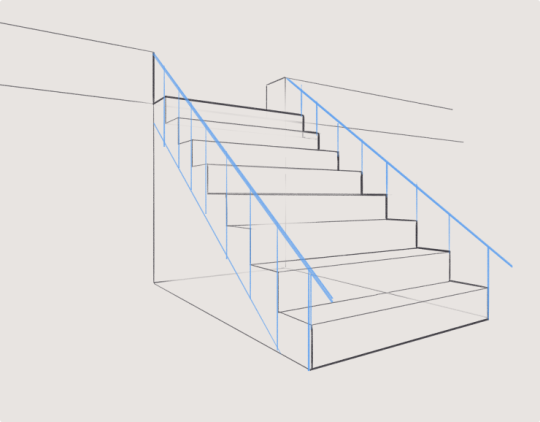
This is important to remember because if you’re trying to draw something like a slope or stairs, something that has an incline, it’s not going to be level with your horizon.
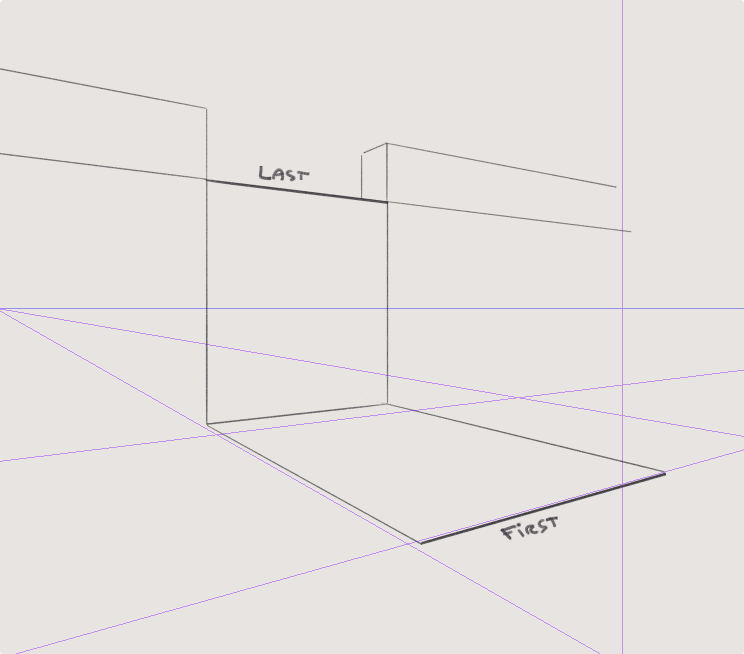
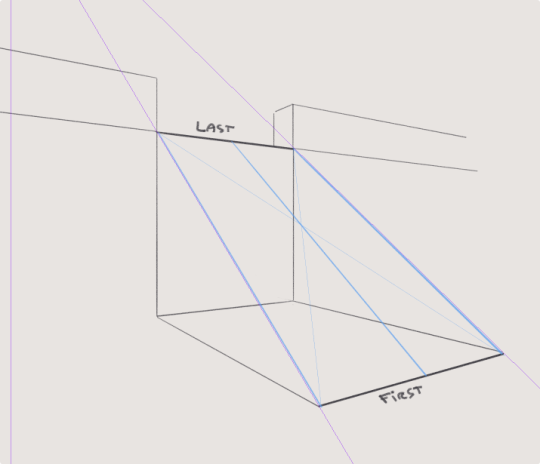
Let’s draw some stairs as an example.
This is actually pretty simple – first draw where your slope starts and ends by drawing a big L shape.
this will give you some parallel corners, which you can then connect to make a new point for your slope
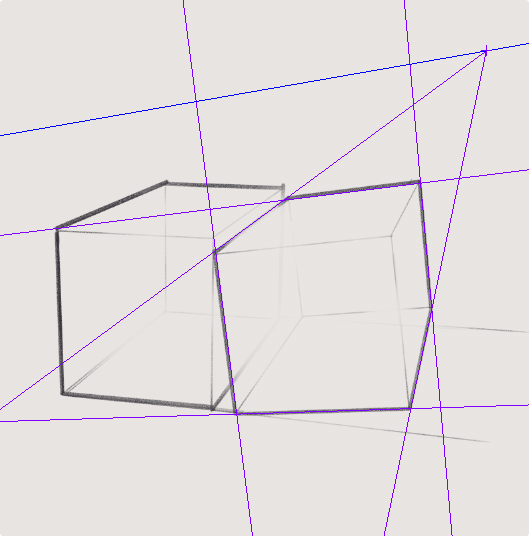
So lets go back to our original cube, with the knowledge that our parallel lines should all converge to a point and draw it again
well, doesn’t that look better!
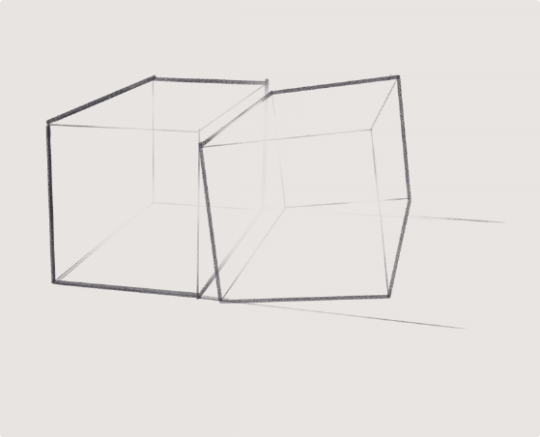
but also, now you know how to make a cube lean against its buddy like this
because we just make new points for the new parallel lines
Anyway I hope that clears some things up, and makes perspective easier to understand!
Also if these tutorials have been helpful and you’d like to support me, I do have a patreon & a ko-fi you can donate to :^)
I’ve noticed a fair few people expressing that they didnt understand this post, and I tried to like explain more but actually after writing for a while I realised more words are probably not going to help is the thing about it.
So! If you don’t understand this post:
1. First the main takeaway here is: Vanishing points represent parallel lines.
that’s it. If that’s all you remember, you have 99% of the post.
2. I recommend bookmarking this post so you can revisit it and reread it a few times, with any advanced concept relating to art just reading about it isn’t going to get it to sink in. You’ll need to experiment and reread it to fully understand it!
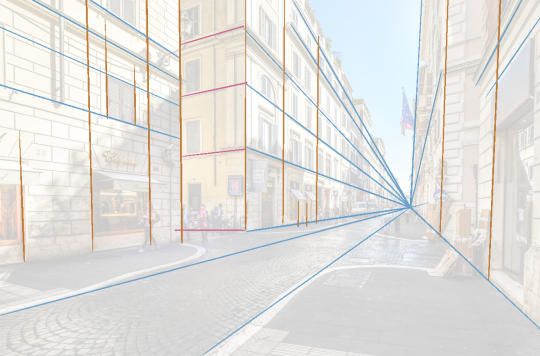
3. Speaking of, here is an exercise you can do that I think might help clarify this post.
Take a look at some photos of architecture, and look for the parallel lines. Actually draw them on top of the photos!
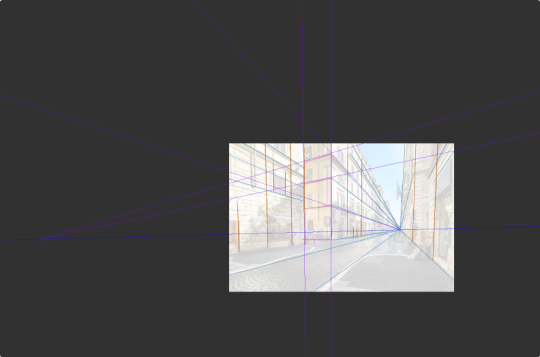
I recommend especially using a program like CSP that lets you set up perspective rulers, so you can see the vanishing points
or you can just make the canvas really big
Anyway! Here’s an image to get you started:
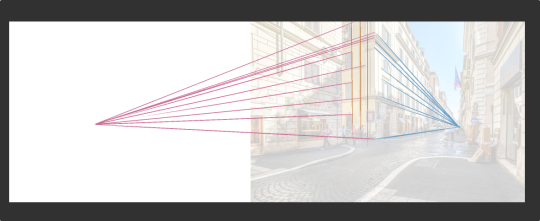
or go out and take some photos of your own and/or have a look on google! Do this a few times with a few different photos, then try drawing some architecture.
just drop the opacity and look for the parallel lines in the architecture.
For those of you that like everything neatly organised, here’s links to EVERY ONE of my first 150how to THINK when you draw TUTORIALS, in ALPHABETICAL ORDER for#SkillUpSunday!Enjoy, link, pin, share! Cheers!
I’ve always wanted to make one of these. Here’s my first expression meme!
Feel free to use this! If you’re using it on tumblr please reblog and do NOT repost it. Feel free to repost it to any other social media platform however, if you’re using it; but give me CREDIT (if you for some reason crop out my Tumblr in the corner).